7.1 Continuous Delivery & GitOps with ArgoCD UI (Pull)
In this guide, you’ll learn how to automate Kubernetes deployments using GitOps principles with the powerful and popular ArgoCD.
By the end of this tutorial, you’ll be able to:
- Install ArgoCD on a Kubernetes cluster
- Deploy applications from a Git repository
- Interact with ArgoCD via both the UI and CLI
Installing ArgoCD on Kubernetes
To get started with ArgoCD, we need to deploy it onto our Kubernetes cluster. Let’s use Helm to install ArgoCD into argocd namespace.
Note
If you run into issues during installation (e.g., secret creation failures), simply delete the namespace and retry the installation.
We want to use the following configuration (~/exercise/kubernetes/Argo/values.yaml) for deploying ArgoCD:
configs:
  params:
    "server.insecure": true
This tells Argo to turn off SSL with a self-signed cert and accept insecure connections. We will use our ingress controller for SSL termination.
Solution
kubectl create namespace argocd
helm repo add argo https://argoproj.github.io/argo-helm
helm repo update
helm install argocd argo/argo-cd -n argocd -f ~/exercise/kubernetes/Argo/values.yaml
The Helm notes:
NOTES:
In order to access the server UI you have the following options:

1. kubectl port-forward service/argocd-server -n argocd 8080:443

    and then open the browser on http://localhost:8080 and accept the certificate

2. enable ingress in the values file `server.ingress.enabled` and either
      - Add the annotation for ssl passthrough: https://argo-cd.readthedocs.io/en/stable/operator-manual/ingress/#option-1-ssl-passthrough
      - Set the `configs.params."server.insecure"` in the values file and terminate SSL at your ingress: https://argo-cd.readthedocs.io/en/stable/operator-manual/ingress/#option-2-multiple-ingress-objects-and-hosts


After reaching the UI the first time you can login with username: admin and the random password generated during the installation. You can find the password by running:

kubectl -n argocd get secret argocd-initial-admin-secret -o jsonpath="{.data.password}" | base64 -d

(You should delete the initial secret afterwards as suggested by the Getting Started Guide: https://argo-cd.readthedocs.io/en/stable/getting_started/#4-login-using-the-cli)
Ensure Argo CD is installed (likely in argocd namespace) and check its Service type:
kubectl get svc -n argocd
Exposing the ArgoCD UI via Ingress
By default, argocd-server is a ClusterIP service — so it’s not reachable outside the cluster without an Ingress, LoadBalancer, or NodePort. Thus, we will use ingress to expose the backend service, the hostname can be defined as argocd.<clustername>.<workshopID>.k8s.workshop.thinkport.cloud.
You can create an Ingress or a HttpRoute (if you did the Traefik task), feel free to select the Ingress controller you want to use.
Solution
Create a file named argo_ingress.yaml and deploy it using kubectl.
apiVersion: networking.k8s.io/v1
kind: Ingress
metadata:
  name: argocd-ingress
  namespace: argocd
spec:
  ingressClassName: nginx
  tls:
  - hosts:
  # TODO
    - argocd.<clustername>.<workshopID>.k8s.workshop.thinkport.cloud
  rules:
  # TODO
  - host: argocd.<clustername>.<workshopID>.k8s.workshop.thinkport.cloud
    http:
      paths:
      - backend:
          service:
            name: argocd-server
            port:
              number: 80
        path: /
        pathType: Prefix
Or as HttpRoute
apiVersion: gateway.networking.k8s.io/v1
kind: HTTPRoute
metadata:
  name: argro-http
  namespace: argocd
spec:
  hostnames:
    #ToDo
    - argo.<cluster>.<workshopID>.k8s.workshop.thinkport.cloud
  parentRefs:
    - group: gateway.networking.k8s.io
      kind: Gateway
      name: traefik-gateway
      namespace: traefik-ingress
  rules:
    - backendRefs:
        - name: argocd-server
          port: 80
Tip
If you have multiple ingress controllers installed, e.g. nginx and Traefik in previous sections, please make sure to specify the ingressClassName here to nginx!
spec:
  ingressClassName: nginx
Using the ArgoCD UI: Deploying the Website App
In this lab we want to deploy a simple website using ArgoCD and GitOps. We will use an example Helm chart for this task. Of course you can also use Kubernetes Manifests directly in ArgoCD.
flowchart LR
    %% Groups as subgraphs
    subgraph Source[Source Control]
        repo[Git Repository<br/><small>Manifests for 'website'</small>]
    end

    subgraph CD[Continuous Delivery - ArgoCD]
        argocd[ArgoCD Controller<br/><small>Pulls & syncs manifests</small>]
    end

    subgraph Target[Target Environment - Kubernetes]
        k8s[Kubernetes API Server]
        website[Application: website<br/><small>Production namespace</small>]
    end

    %% Links
    repo --> argocd
    argocd --> k8s
    k8s --> website

    %% Add padding to groups
    style Source padding:20px
    style CD padding:20px
    style Target padding:20px
As we already setup the ingress resource in the last step, we can access the ArgoCD UI that backed by service argocd-server:
https://argocd.<clustername>.<workshopID>.k8s.workshop.thinkport.cloud
By default, when ArgoCD is deployed, an admin user is created.
The password is stored in the argocd-initial-admin-secret Kubernetes Secret.
Retrieve this value and decode it to obtain the password.
Solution
kubectl -n argocd get secret argocd-initial-admin-secret -o jsonpath="{.data.password}" | base64 -d && echo
Learn from ArgoCD UI
After a successful UI login, click + NEW APP and take a quick overview of the fields that required for coniguration, but we can just pause from here since we need to proceed with setting up the repository first.
Solution
Tip
In today’s GitOps landscape, the repository that contains the configuration files is treated as the single-source-of-truth.
Prerequisits: Prepare a repository
We have pre-provisioned dedicated users and corresponding repositories exclusively assigned to you. To access your personal repository, please use your unique credential below to access our Git url at https://gitea.\<workshop_id>.k8s.workshop.thinkport.cloud
Logins
Replace the order number i with the real number assigned to you.
User:    user<i>
Password: Passwd-<i>
Now we need to initialize a repository for further deployment, follow the instructions below step by step:
Instructions
Open a terminal on your virtual machine and start!
# Clone an existing public repository
git clone https://gitea.<workshop_id>.k8s.workshop.thinkport.cloud/gitea-tp/tp-website.git temp-repo

# Remove its git history
rm -rf temp-repo/.git

# Move to a clean project folder
mv temp-repo tp-website
cd tp-website

# Initialize a new repo
git config --global user.email "you@example.com"
git config --global user.name "Your Name"
git init
git checkout -b main
git add .
git commit -m "Initial commit based on existing Gitea repo"
<username> with your specific user name
# Add their own Gitea repo as remote, replace
git remote add origin https://gitea.<workshop_id>.k8s.workshop.thinkport.cloud/<username>/repo-<username>.git
git push -u origin main
Congrats!
Now you are done with initialization, let’s move on to the next step!
Deploying the Website App
Then, hit the Argo UI we have earlier at https://argocd.<clustername>.<workshopID>.k8s.workshop.thinkport.cloud.
First things first, let’s authenticate repository that created earlier:
We use HTTP(S) method here for simplicication, modify these fields:
Instructions
- Go to Settings on the left panel ->
+ CONNECT REPO - Choose your connection method ->
VIA HTTP/HTTPS - CONNECT REPO USING HTTP/HTTPS ->
- Type:
git - Project:
default - Repository URL:
https://gitea.<workshop_id>.k8s.workshop.thinkport.cloud/<username>/repo-<username>.git - Username:
<your_repo_username> - Password:
<your_repo_password>
- Type:
- Click CONNECT
Now your private repository is authenticated by ArgoCD successfully!
Question
Where and how are the credentials stored in ArgoCD? Argo will manage all resources as Kubernetes resources by CRDs or native types. You can check the documentation for more details.
Our repository config is stored a secret. Do you still remember the concept of labels and selectors? Well, Argo is using labels to select the correct secrets for the different configuration type. We can get all repository configurations by selecting the label argocd.argoproj.io/secret-type: repository.
A kubectl command would look like this: k get -n argocd secrets -o yaml -l argocd.argoproj.io/secret-type=repository
apiVersion: v1
items:
- apiVersion: v1
  data:
    name: V2Vic2l0ZQ==
    password: UGFzc3dkLTc=
    project: ZGVmYXVsdA==
    type: Z2l0
    url: aHR0cDovL2dpdC5rOHMud29ya3Nob3AudGhpbmtwb3J0LmNsb3VkOjMwMDEvdXNlcjcvcmVwby11c2VyNy5naXQ=
    username: dXNlcjc=
  kind: Secret
  metadata:
    annotations:
      managed-by: argocd.argoproj.io
    creationTimestamp: "2025-08-15T17:41:55Z"
    labels:
      argocd.argoproj.io/secret-type: repository
    name: repo-3610149550
    namespace: argocd
    resourceVersion: "4076928"
    uid: 505e08e9-68e1-4bb9-9fb9-21e7e76cf75e
  type: Opaque
kind: List
metadata:
  resourceVersion: ""
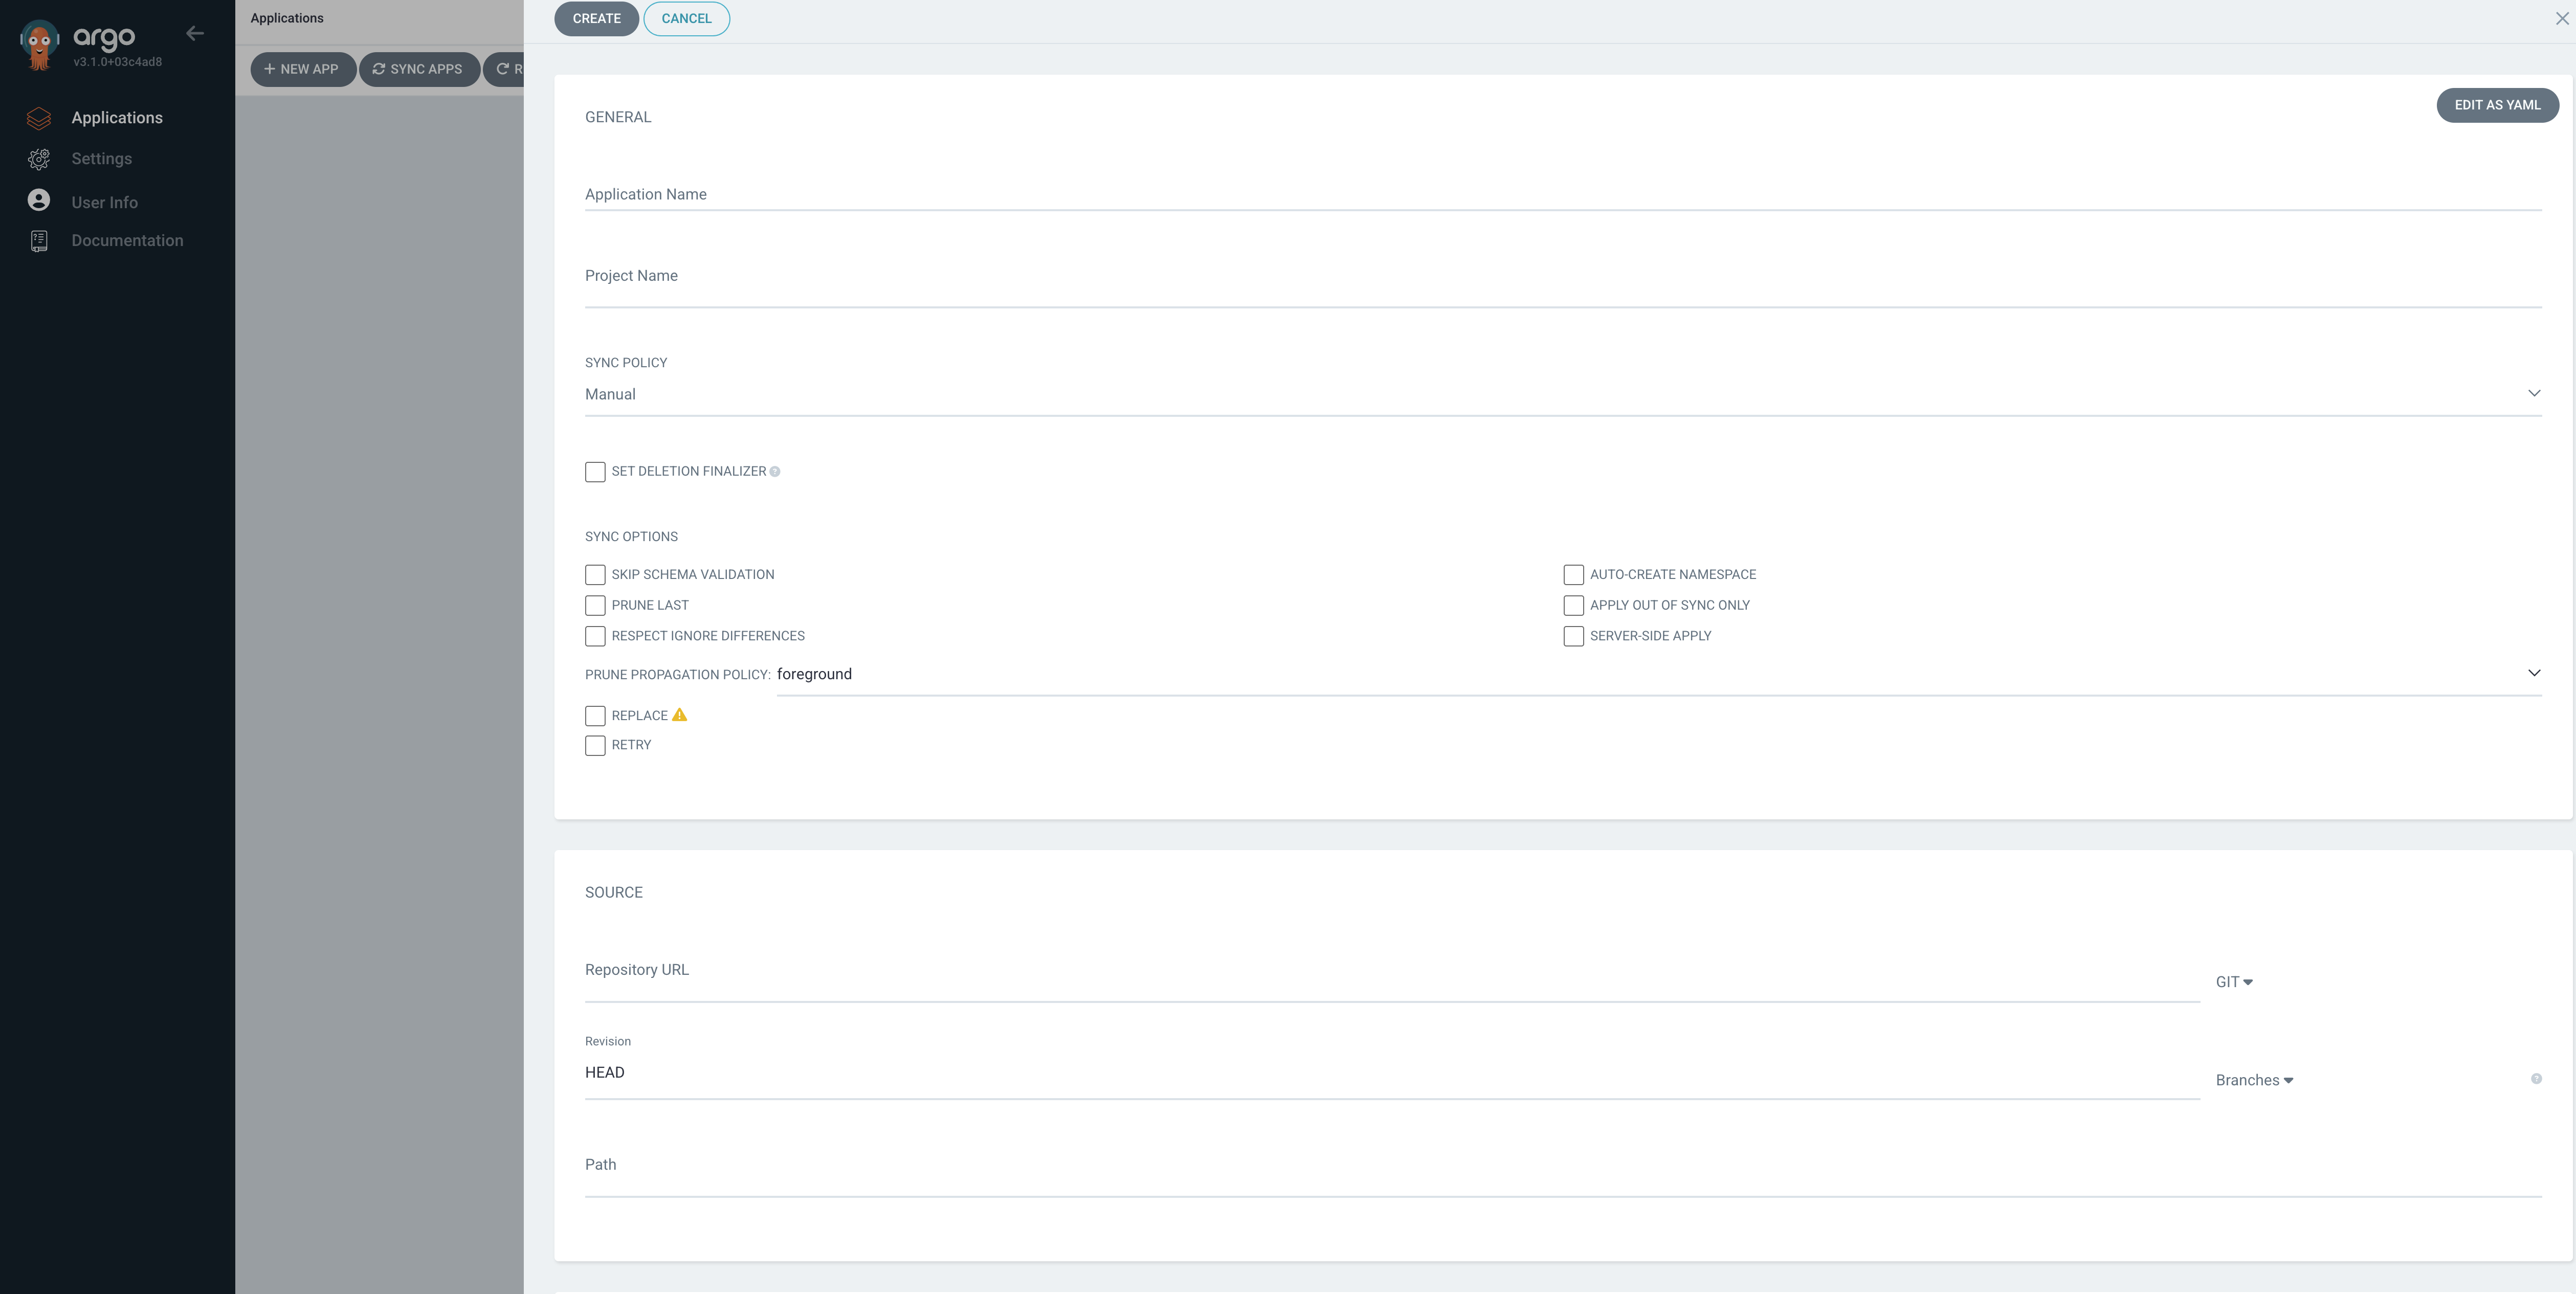
Click + NEW APP, now connect the repository with ArgoCD step by step.
Instructions
General ->
- Application Name:
tp-website - Project Name:
default - SYNC POLICY:
MANUAL - SYNC OPTIONS: tick
Auto-Create Namespace
SOURCE -> (replace the
- Repository URL:
https://gitea.<workshop_id>.k8s.workshop.thinkport.cloud/<username>/repo-<username>.git - Revision:
HEAD - Path:
.
Destination ->
- Cluster URL:
https://kubernetes.default.svc(Point to current cluster) - Namespace:
webapp
Click CREATE on the top left, then you will see the application page where displays key information about application name and basic metadata, such its Status (e.g., Healthy, Out of Sync), the Sync status, the Namespace, the repository URL, and the target revision.
At this point, the application has not yet been deployed. Click SYNC in the Argo CD dashboard to initiate the deployment process. After a few seconds, the application should be deployed to the cluster and its service exposed.
Tip
Also, the application is a Kubernetes resource. We can view it by running: k -n argocd get applications -o yaml
apiVersion: v1
items:
- apiVersion: argoproj.io/v1alpha1
  kind: Application
  metadata:
    creationTimestamp: "2025-08-15T18:03:00Z"
    generation: 3
    name: tp-website
    namespace: argocd
    resourceVersion: "4083600"
    uid: d882c6cd-c0ef-4c53-b6ed-05b5fd0494d2
  spec:
    destination:
      namespace: webapp
      server: https://kubernetes.default.svc
    project: default
    source:
      path: .
      repoURL: https://gitea.<workshop_id>.k8s.workshop.thinkport.cloud/userX/repo-userX.git
      targetRevision: HEAD
    syncPolicy:
      syncOptions:
      - CreateNamespace=true
  status:
    controllerNamespace: argocd
    health:
      lastTransitionTime: "2025-08-15T18:03:02Z"
      status: Missing
    reconciledAt: "2025-08-15T18:03:00Z"
    resourceHealthSource: appTree
    resources:
    - kind: ConfigMap
      name: site-html
      namespace: webapp
      status: OutOfSync
      version: v1
    - kind: Service
      name: site
      namespace: webapp
      status: OutOfSync
      version: v1
    - group: apps
      kind: Deployment
      name: site
      namespace: webapp
      status: OutOfSync
      version: v1
    sourceHydrator: {}
    sourceType: Helm
    summary: {}
    sync:
      comparedTo:
        destination:
          namespace: webapp
          server: https://kubernetes.default.svc
        source:
          path: .
          repoURL: https://gitea.<workshop_id>.k8s.workshop.thinkport.cloud/userX/repo-userX.git
          targetRevision: HEAD
      revision: 5ad65266fb9f69040fcd6df6938cfbef0e87d751
      status: OutOfSync
kind: List
metadata:
  resourceVersion: ""
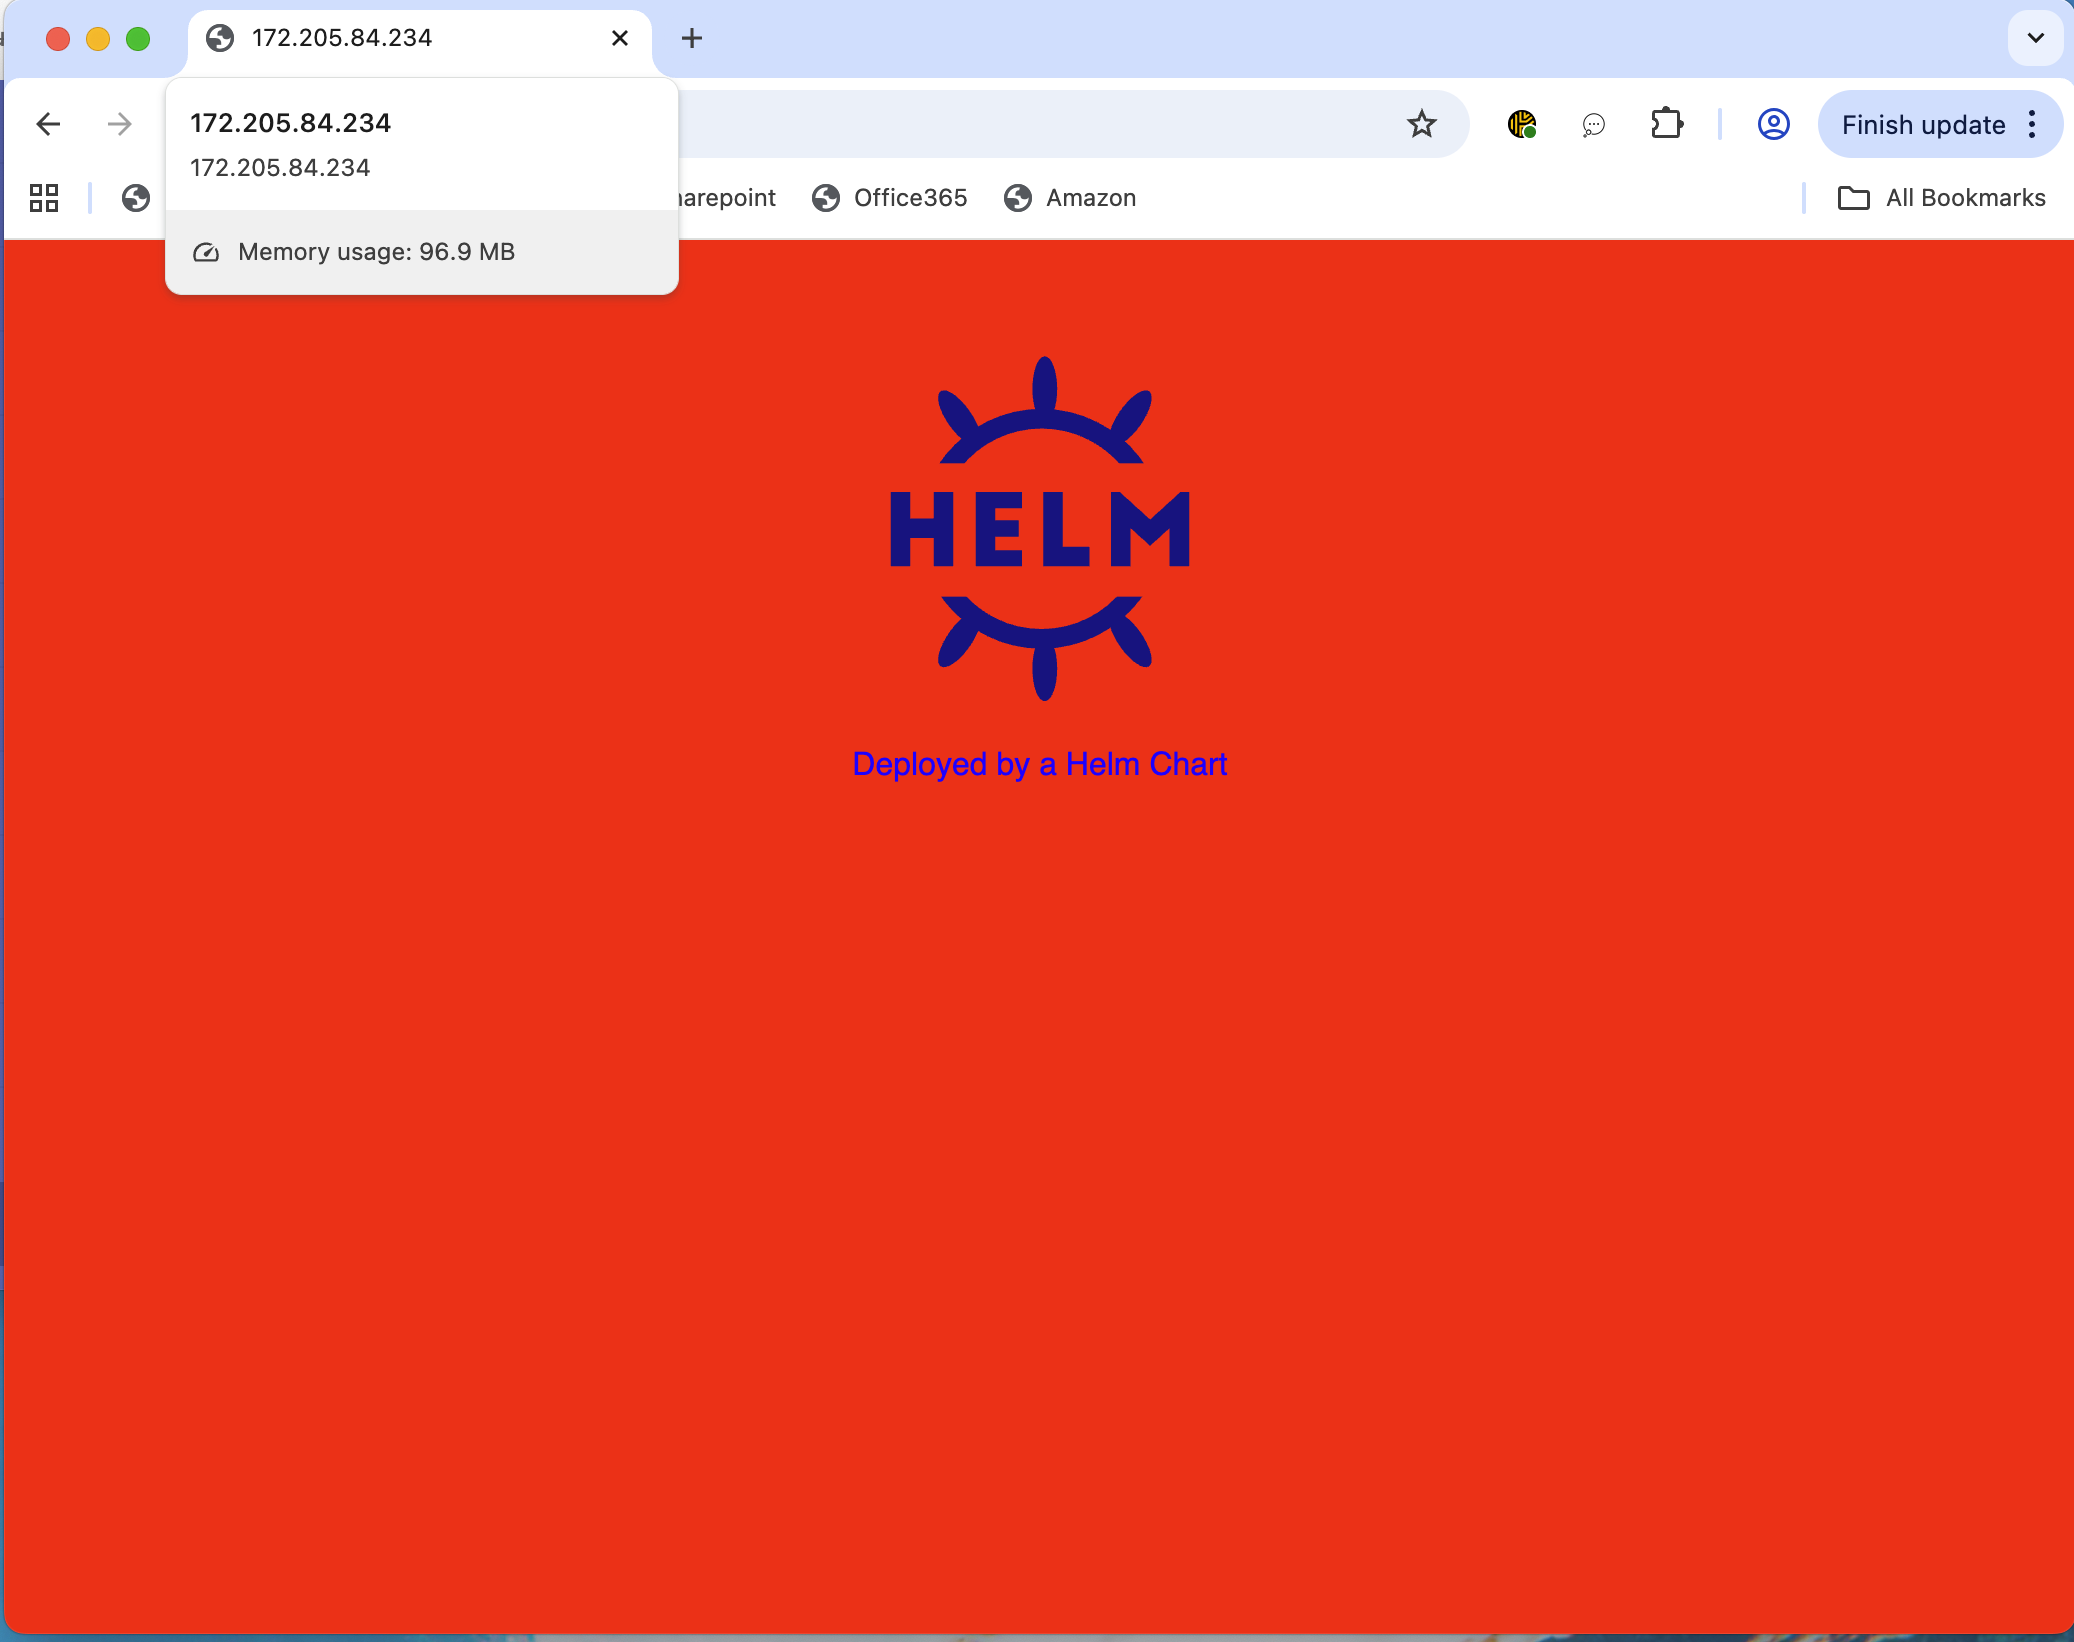
You can access the web application via the Service’s external IP. To retrieve it, run:
kubectl -n webapp get svc
By default, you should see the website’s background color is set to red.
Solution
Tip
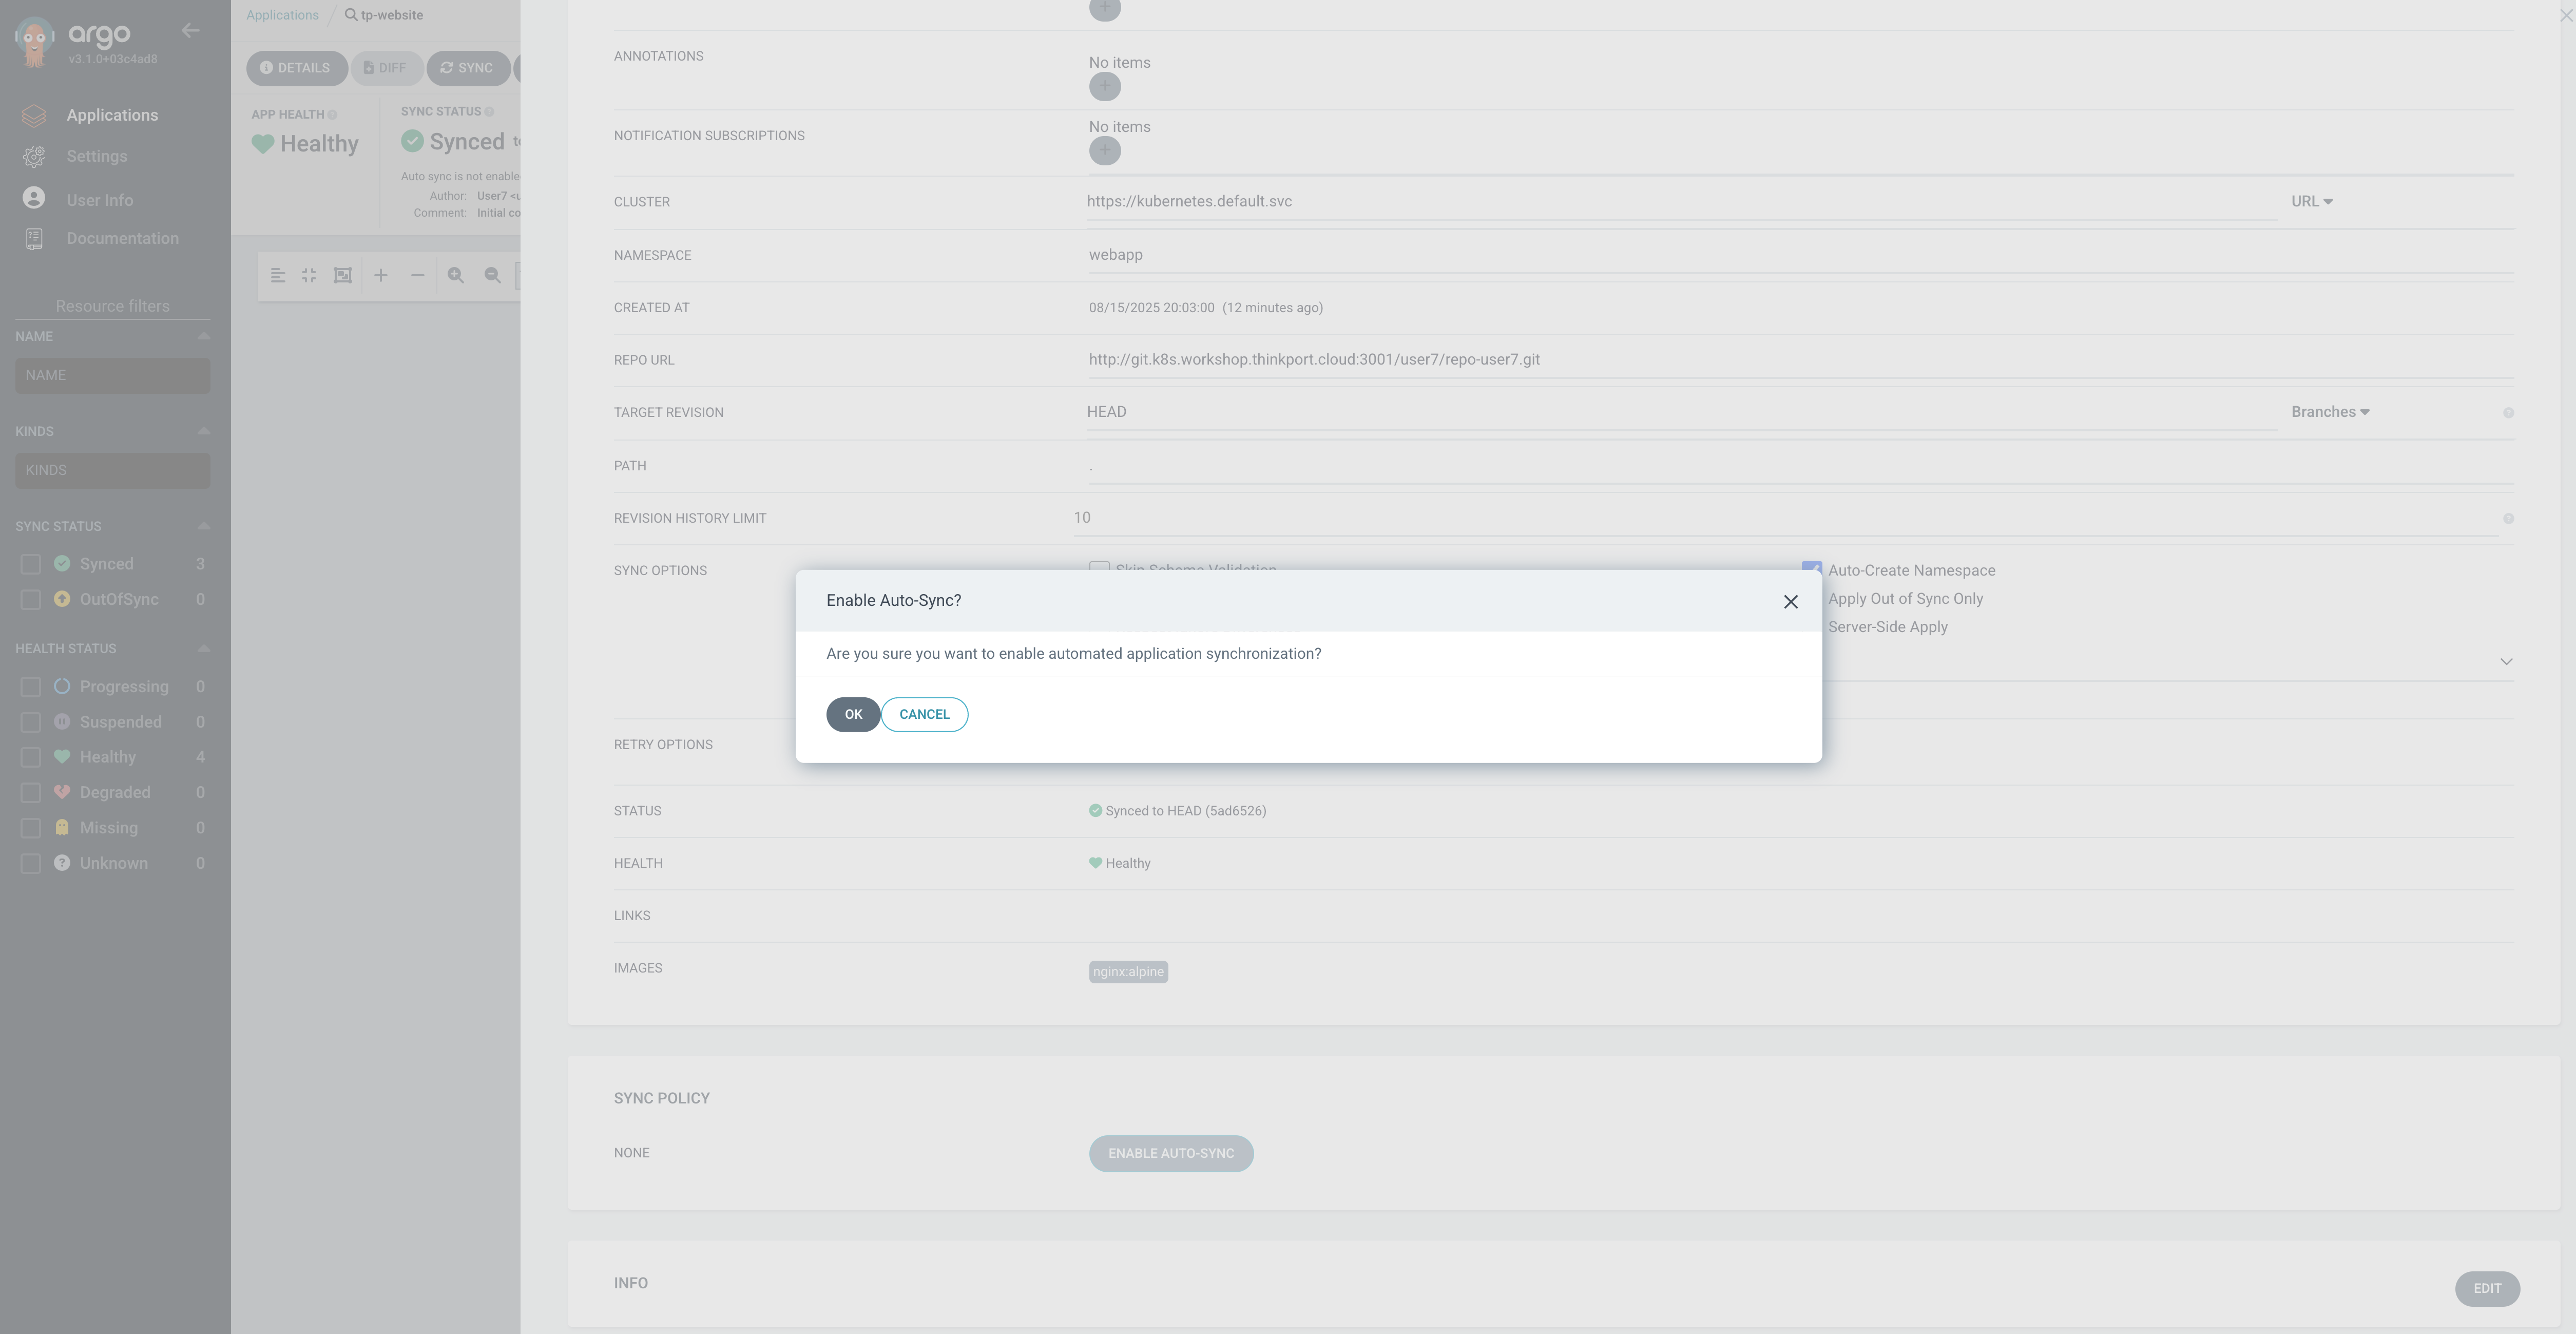
In this setup, you must notice that the synchronization is triggered manually.
Now enable Auto-Sync in the application dashboard in the UI by opening up the Details tab of your application in the Argo UI.
Solution
- open the Application dashboard,
- click on details
- edit the SYNC POLICY settings,
- and select Enable Auto-Sync
- Save the settings
Tip
Compare the application resource to the old one!
apiVersion: v1
items:
- apiVersion: argoproj.io/v1alpha1
  kind: Application
  metadata:
    creationTimestamp: "2025-08-15T18:03:00Z"
    generation: 19
    name: tp-website
    namespace: argocd
    resourceVersion: "4088988"
    uid: d882c6cd-c0ef-4c53-b6ed-05b5fd0494d2
  spec:
    destination:
      namespace: webapp
      server: https://kubernetes.default.svc
    project: default
    source:
      path: .
      repoURL: https://gitea.<workshop_id>.k8s.workshop.thinkport.cloud/user7/repo-user7.git
      targetRevision: HEAD
    syncPolicy:
      automated:
        enabled: true
      syncOptions:
      - CreateNamespace=true
  status:
    controllerNamespace: argocd
    health:
      lastTransitionTime: "2025-08-15T18:06:07Z"
      status: Healthy
    history:
    - deployStartedAt: "2025-08-15T18:05:57Z"
      deployedAt: "2025-08-15T18:05:57Z"
      id: 0
      initiatedBy:
        username: admin
      revision: 5ad65266fb9f69040fcd6df6938cfbef0e87d751
      source:
        path: .
        repoURL: https://gitea.<workshop_id>.k8s.workshop.thinkport.cloud/user7/repo-user7.git
        targetRevision: HEAD
    operationState:
      finishedAt: "2025-08-15T18:05:57Z"
      message: successfully synced (all tasks run)
      operation:
        initiatedBy:
          username: admin
        retry: {}
        sync:
          revision: 5ad65266fb9f69040fcd6df6938cfbef0e87d751
          syncOptions:
          - CreateNamespace=true
          syncStrategy:
            hook: {}
      phase: Succeeded
      startedAt: "2025-08-15T18:05:57Z"
      syncResult:
        resources:
        - group: ""
          hookPhase: Running
          kind: Namespace
          message: namespace/webapp created
          name: webapp
          namespace: ""
          status: Synced
          syncPhase: PreSync
          version: v1
        - group: ""
          hookPhase: Running
          kind: ConfigMap
          message: configmap/site-html created
          name: site-html
          namespace: webapp
          status: Synced
          syncPhase: Sync
          version: v1
        - group: ""
          hookPhase: Running
          kind: Service
          message: service/site created
          name: site
          namespace: webapp
          status: Synced
          syncPhase: Sync
          version: v1
        - group: apps
          hookPhase: Running
          images:
          - nginx:alpine
          kind: Deployment
          message: deployment.apps/site created
          name: site
          namespace: webapp
          status: Synced
          syncPhase: Sync
          version: v1
        revision: 5ad65266fb9f69040fcd6df6938cfbef0e87d751
        source:
          path: .
          repoURL: https://gitea.<workshop_id>.k8s.workshop.thinkport.cloud/user7/repo-user7.git
          targetRevision: HEAD
    reconciledAt: "2025-08-15T18:20:07Z"
    resourceHealthSource: appTree
    resources:
    - kind: ConfigMap
      name: site-html
      namespace: webapp
      status: Synced
      version: v1
    - kind: Service
      name: site
      namespace: webapp
      status: Synced
      version: v1
    - group: apps
      kind: Deployment
      name: site
      namespace: webapp
      status: Synced
      version: v1
    sourceHydrator: {}
    sourceType: Helm
    summary:
      images:
      - nginx:alpine
    sync:
      comparedTo:
        destination:
          namespace: webapp
          server: https://kubernetes.default.svc
        source:
          path: .
          repoURL: https://gitea.<workshop_id>.k8s.workshop.thinkport.cloud/user7/repo-user7.git
          targetRevision: HEAD
      revision: 5ad65266fb9f69040fcd6df6938cfbef0e87d751
      status: Synced
kind: List
metadata:
  resourceVersion: ""
We can see that the syncPolicy was changed:
syncPolicy:
  automated:
    enabled: true
Modifying the Website App
Navigate to your local git project directory (tp-website) and open the values.yaml file. Locate the backgroundColor field and change its value from red to a color of your choice (e.g., “green”).
After modifying the values.yaml , commit and push the changes.
Solution
You can also use the UI editor of GitTea if you want!
git add values.yaml
git commit -m "Change background color: red → green"
git push
Refresh the webpage to verify whether the background color has updated!
Hint
No changes? That’s expected — by default, Argo CD polls for application manifest changes every 3 minutes(180 secs).
The automatic synchronization interval is controlled by the timeout.reconciliation setting in the argocd-cm ConfigMap. By default, it is set to 120 seconds, with an added jitter of up to 60 seconds, resulting in a maximum reconciliation period of approximately 3 minutes.
Tip
- Authenticate the Git repository before initiating anything else.
- The synchronization interval can be more conveniently adjusted using the Argo CD CLI.
Experiment
Now, delete a Resource of the WebApp. E.g. delete the service by running
kubectl -n webapp delete svc site. What is happening? Take a look on the Argo Application in the Dashboard!